Headliner Interior - Aerosport

Aerosport Products Headliner

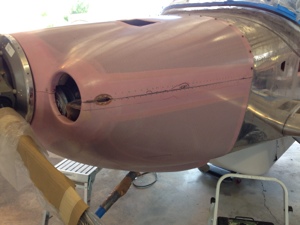
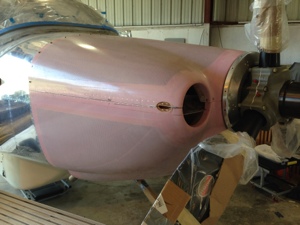
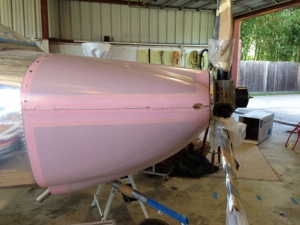
5 hours, 8 June 2104

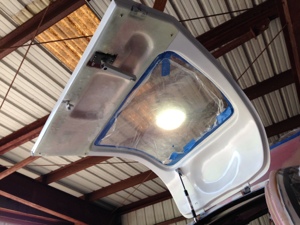
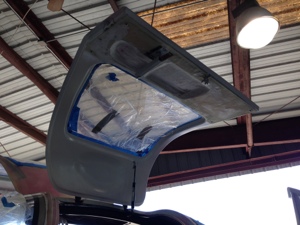
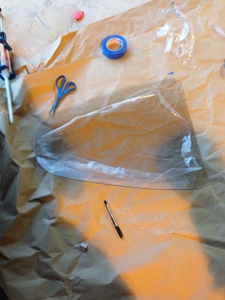
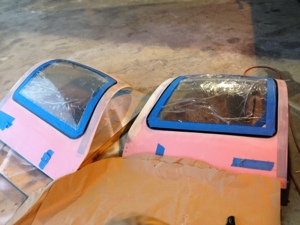
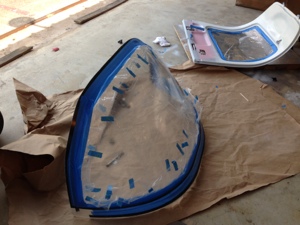
On Friday 6th we received the headliner from Aerosport. My wife was excited to start working on putting the headliner on the fiberglass headliner parts. She laid down a blanket and all her supply’s and watched Geoff’s install videos a couple of times then went to work on it. It turned out very nice but I goofed up and didn’t take into account the thickness of the material and so it cover our LED strip lighting we have on the top of where the headliner meets the overhead ducting. I will order some of the rubber trim that we put around the windows and use that to finish off the trimmed area that I will need to remove to the LED lights can still be seen. A real bummer since my wife did a great job on the covering. Pictures to come..

ShowPlanes Cowling

Show Plans Cowl – bottom return air pleum

2 hours, 8 June 201 4

My dad mounted the return air cowling attachment for the Show Planes cowling. I had previously only has it cleco’d in place. He used rivnuts on the bottom side and attached the return air cowling.

Avionics G3X Components Wire Routing

Re-routing of HID and Wing Tip Tax/Landing Light wire

4 hours, 6 June 2014.

I had performed an EMI test using the G3X previously and when the left HID and/or Wing Tip Taxi light was switched ON the EMI value went to 340% over. When the wings were wired I had not chosen the avionics system yet and hadn’t planned on routing the magnetometer in the left wing, things changed and so I need to change the wiring to accommodate the very sensitive magnetometer. I ordered 50 feet of 18 ga. shielded, twisted wire and pulled the old wire out and pulled in the new wire. According to the Garmin manual the cable shield should be terminated on both ends. I finished connecting the power, ground and shield wires and powered up the system. I only had a 4% rise in EMI. It passed.

Engine

Engine run

2 hours, 6 June 2014

First engine start while on the airframe. With a watchful eye and help from my dad we prepped the airplane for first engine start. Dave Forster, my neighbor and local EAA Tech Counselor was on hand as another watchful eye.

Had I used a checklist for first engine start I would have remembered to Turn on the ignition and ECU switches. Otherwise the start was quick and uneventful.

First engine run we didn’t want to run the engine above idle until oil temp was over 100. It NEVER got there before the cylinder temps got to 300 where the engine builder told me the ground run limit should be.

Second engine run was later in the day and we started with 94 degree oil temp and ambient cylinder temps. Oil only rose to 98 and I went ahead and went up to 1700 RPM to cycle the prop. After about 8 cycles of the prop lever the prop never cycled. Wee dedicated that another engine run was required because we needed the prior working correctly and needed to verify max rpm.

We ran the engine on the June 7 with good luck as I had read on he VAF chat group about the Hartzell wanting a higher RPM to move the oil into the hub. I ran the engine to 1800 and on the third cycle of the prop lever the prop started to cycle. All this was done prior to the CHT reaching 300F.

We ran the engine once ore to set the max rpm. It is now reading 2690 RPM on the ground with full power. Again we kept the CHT below 300.

Engine run completed until first flight.

No issues at all other than prop pitch adjustment.

20140609-112526.jpg

20140609-113316.jpg

Avionics

New Front Avionic Panels for middle and copilot side

2 hours, 6 June
I received the copilot and center avionics panels I ordered from Front Panel express. They turned out fantastic. I installed them and they fit very nicely.

I now need to create the pilot side panel.

20140609-104914.jpg

Interior - Aerosport Seats

Seats Arrived, at least the front two…

2 hours, 6 June 2014,

Front two seats arrived from Aerosports. Zac did a great job coordinating the seat color and layout with us. We very much like the two front seats and are excited about the rear seats to arrive after they receive new hide.

20140609-104257.jpg

20140609-104327.jpg

20140609-105159.jpg

Show Planes Cowl

Show Panes Cowling

2 hours, 1 June 2014

I put the upper and lower cowling on the airplane. This is the first time both halves have been put together on the airplane. Both cowl halves went together surprising well. I had to trim a couple of pieces off the engine baffling to help fit the cowl better. I also final trimmed the two horizontal cowl hinge pins.

I noticed the AC compressor clutch is interfering with the front left side of the cowling. SO I trimmed out the cowling and added a bump out to the accommodate the AC clutch.

20140602-140708.jpg

20140602-140714.jpg

20140602-140719.jpg

20140602-140743.jpg

Section 45, Cabin Doors and Transparencies

Installed the doors – again

2 hours, 1 June 2014

I installed the doors and bolted on the gas struts. I also put on the lower door interior fiberglass covers and screwed them into place. I am holding off adding the final interior parts since I don’t want to scratch them while I am still working on the aircraft interior.

20140602-140105.jpg

20140602-140111.jpg

Section 45, Cabin Doors and Transparencies

Installed Windows

8 hours, 29 May 2014

I received the Cee Bailey’s windows on Thursday 29th, 2014. What a great product. Very minimal sanding required to fit all the window recesses. I used the LORD adhesive sold by Aerosport’s – Geoff. I already had the applicator gun. Other than the prep work for fitting and sanding the windows then tapping the all the process went very easy. I am very disappointed in my lack of skills when it comes to working with the adhesive and sticking the windows in. Overall the windows look good and are installed. The interior sides of the windows are finished. The outside of the windows will take some time to complete.

The front wind screen fairing is another story. Again I am a little disappointed with my skill set on this also. Needless to stay there is lots of sanding involved. I really screwed up on where I placed the upper fiberglass fairing tape line. I wanted the line to be as low as possible and it turns out I have it about two inches to high. I am already a short persons and fear this will come back to bit me in the rear when I cant see over the window properly. the main issue is that I already sanded the window.. oh well.

20140602-135601.jpg

20140602-135611.jpg

20140602-135620.jpg

20140602-135641.jpg

20140602-135647.jpg

20140602-135728.jpg

Avionics

Pushed airplane out of the hangar for first time

2 hours, 23 May 2014

I cleaned out the hangar a bit so I could move out the airplane as to maybe align the magnometer and perform some other checks. As it turns out I was not able to align the magnometer nor was I able to pass the EMI testing with the left HID and/or Taxi Light on. If only the right side was turned on it was ok but with the left on it drove the reading to over 300% more than acceptable. I do recognize I locally grounded the HID and Taxi light but with running a dedicated ground back for either the HID or Taxi light does not correct the issue. I am not sure of the solution yet but I think I might need the LED lights sooner than I thought.

20140602-134454.jpg