Category Archives: Finish Kit

Section 45, Cabin Doors and Transparencies

More Window Work

10 Hours, 14 June 2013

I decided I would finish up the windows the best I could for flying and deal with the fine details after flying was started. My wife and I have decided to paint in about 1 year or less so I will concentrate on the fine details of the windows at a later date.

20140617-134342.jpg

20140617-134349.jpg

Finish Kit Fuselage

Starting to put close out panels on

2 Hours, 8 June 2014

I have started to attach the panels that wont be removed during the inspection. Although I wonder if they will be asked to be removed as my pinion is there is only wire behind the panel and nothing to look at otherwise they should stay on. We shall see….

20140610-075323.jpg

20140610-075329.jpg

20140610-075336.jpg

20140610-075343.jpg

ShowPlanes Cowling

Show Plans Cowl – bottom return air pleum

2 hours, 8 June 201 4

My dad mounted the return air cowling attachment for the Show Planes cowling. I had previously only has it cleco’d in place. He used rivnuts on the bottom side and attached the return air cowling.

Section 45, Cabin Doors and Transparencies

Installed the doors – again

2 hours, 1 June 2014

I installed the doors and bolted on the gas struts. I also put on the lower door interior fiberglass covers and screwed them into place. I am holding off adding the final interior parts since I don’t want to scratch them while I am still working on the aircraft interior.

20140602-140105.jpg

20140602-140111.jpg

Section 45, Cabin Doors and Transparencies

Installed Windows

8 hours, 29 May 2014

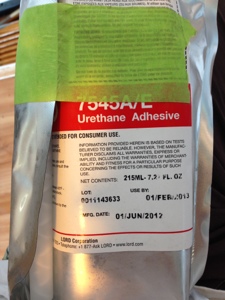
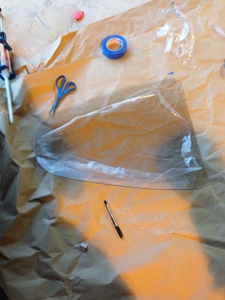
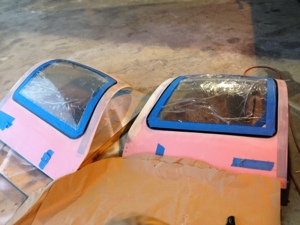
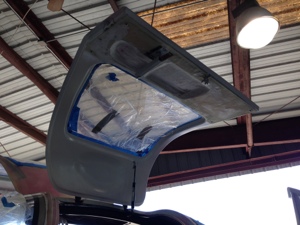
I received the Cee Bailey’s windows on Thursday 29th, 2014. What a great product. Very minimal sanding required to fit all the window recesses. I used the LORD adhesive sold by Aerosport’s – Geoff. I already had the applicator gun. Other than the prep work for fitting and sanding the windows then tapping the all the process went very easy. I am very disappointed in my lack of skills when it comes to working with the adhesive and sticking the windows in. Overall the windows look good and are installed. The interior sides of the windows are finished. The outside of the windows will take some time to complete.

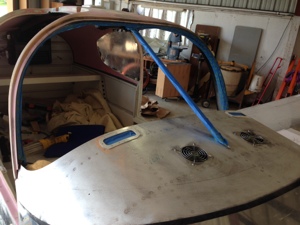
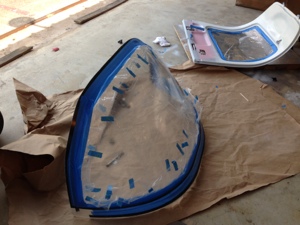
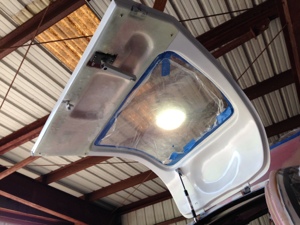
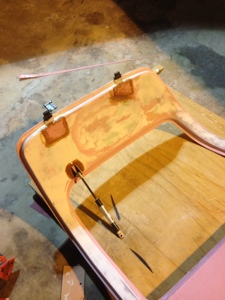
The front wind screen fairing is another story. Again I am a little disappointed with my skill set on this also. Needless to stay there is lots of sanding involved. I really screwed up on where I placed the upper fiberglass fairing tape line. I wanted the line to be as low as possible and it turns out I have it about two inches to high. I am already a short persons and fear this will come back to bit me in the rear when I cant see over the window properly. the main issue is that I already sanded the window.. oh well.

20140602-135601.jpg

20140602-135611.jpg

20140602-135620.jpg

20140602-135641.jpg

20140602-135647.jpg

20140602-135728.jpg

Section 45, Cabin Doors and Transparencies

Door Interior Painting

Paint used on the interior Doors

20140602-132653.jpg

20140602-132705.jpg

20140602-132723.jpg

20140602-132734.jpg

Section 45, Cabin Doors and Transparencies

Door Work and Interior Overhead Work

May 22, 2014, 3 hours

I removed the right door to start working on the small cover panel for over the door mechanical mechanism. This will help hide the ugly holes in the door. I laid up two layers of fiberglass on the door. Will trim it out today hopefully and start smoothing out the interior door surface for paint.

I kept working with the overhead fiberglass with smoothing it out filling the pin holes and trying to make it look decent. Lots of dust and hard work. I should have done this prior to putting on the cabin top but I really didnt know what I wanted to do at that time.

Section 35, Fuselage Interior Panels Section 45, Cabin Doors and Transparencies

Interior and Door work

May 18, 2014. 8 hours

The horrible fiberglass work continues…. I have been working on the left door trying to finish it before I install the window. I had smoothed out the inside door the best I could with UV Smooth Prime and then a Dupli-Color primer filler (FP101 Grey Filler). This actually worked well as I didn’t expect it to. I then followed it with Dupli-Color Acrylic Enamel Gloss White (DA1670) and then a Dupli-Color Acrylic Enamel (Crystal Clear Coat DA1692).

Prior to all the painting I closed out the hinge attach points. We plan to cover the lower panel that covers the access into the door mechanism with some material yet to be picked out.

20140523-134142.jpg

ShowPlanes Cowling

Left Side Cowling Inlet Ramp

March 30, 2014, 10 hours

Much time was spent on figuring out how I wanted to handle the Show Planes inlet intake and the AC Compressor being located ALL in ONE place. I modified the inlet snorkel by cutting down the side interfering with the AC Compressor. Once I had those pieces fitted I moved on to handling the ramp that sits above the inlet snorkel for the fuel servo. I decided I would use as much aluminum as I could and then use the rubber baffle material to close in the area that I could not easily cover with the aluminum over the AC Compressor.

I added some support to the baffle material that runs around the prop servo and up towards the top of the engine case to help support the removable of the modular piece that is required to be attached to the inlet snorkel. This was needed since the inlet snorkel has to be removable for servicing of the air filters.

20140402-092801.jpg

20140402-092842.jpg

Engine ShowPlanes Cowling

ShowPlanes Cowling Work Oil Door

March 24, 2014, 1 hour

I worked on fiberglass for the right side cowl induction of the ShowPlanes cowling. I then moved to the oil door and started to trim it down to size.

I did have a little help 🙂

20140325-144416.jpg