Category Archives: Wire Routing

Avionics G3X Components Wire Routing

Re-routing of HID and Wing Tip Tax/Landing Light wire

4 hours, 6 June 2014.

I had performed an EMI test using the G3X previously and when the left HID and/or Wing Tip Taxi light was switched ON the EMI value went to 340% over. When the wings were wired I had not chosen the avionics system yet and hadn’t planned on routing the magnetometer in the left wing, things changed and so I need to change the wiring to accommodate the very sensitive magnetometer. I ordered 50 feet of 18 ga. shielded, twisted wire and pulled the old wire out and pulled in the new wire. According to the Garmin manual the cable shield should be terminated on both ends. I finished connecting the power, ground and shield wires and powered up the system. I only had a 4% rise in EMI. It passed.

Wire Routing

Pitot Tube, AOA Tubes, Reconnect overhead Panel Wire

April 29th,2014, 3 hours

I routed the Pitot tube and two AOA tubes from the pilot side wall to underneath the dash and to their respective locations. Connected the AOA tubes to the AOA BOX and the Pitot Tube to the GSU25’s.

The overhead panel contains switches for controlling the WingTip Taxi and WingTip Landing lights, the Nav lights, the marker lights and the strobe lights. These overhead switches have LED lights in them. When you push in the Marker Light switch the LED and Marker LIght switch LED should light up. They did not. I found I had routed the power wire back to the fuse panel instead of the VPX J10-4. Corrected the wire placement and LED’s work now when the Marker Light (Nav Lights) are switched on.

Avionics Wire Routing

Tunnel Battery and Center Arm Rest Audio connections

Jan 17-18th, 2013. 16 Hours

I terminated the center arm rest audio panel phone/mic connections along with the USB power point and 12V power point connections. I then moved to the center tunnel battery. Ran a 4 AWG ground wire from the battery to the firewall common grounding point.

20140120-093312.jpg

20140120-093318.jpg

20140120-093324.jpg

20140120-093330.jpg

20140120-093335.jpg

20140120-093346.jpg

20140120-093406.jpg

Avionics Wire Routing

Wing Root wire connections

Jan 11th, 2013. 16 hours
I worked the wing root wire connections on both wings and both sides of the fuselage. I also routed wires as required from the wing into the fuselage and back out as needed. This was a long process. Also terminated the coax VHF antenna’s for a male connection at the fuselage and terminated both end of the vhf cable in the wing. I decided to split the Roll servo harness at the wing root, this allowed me to route the wire through the wing and connect the servo. I needed to do this since I could not properly operate the Garmin system since it requires the CAN buss to communicate with all devices on the buss unless you have a terminator for the buss. I figured it would be easier to add the root connection than to worry about the CAN buss termination point. This also allowed me to roll the wing very near the fuselage and connect the roll servo so I could properly power the Garmin system and upgrade the system software.

I did not add a connector for the Dynon or Garmin magnetometer at this point.

20140120-083907.jpg

20140120-083927.jpg

20140120-083934.jpg

Avionics Wire Routing

Avionics wire work

Jan 4-5, 2014. 16 hours.

I terminated control wires to the starter and contractor coils on the firewall. I connected the starter sense wire with a 1k ohm 1 watt resistor back to the VPX Pro box so it can sense when the starter is engaged. I cut to length and terminated many of the wing root connections on the left and right side. I still need to connect the pitot heater sensor led wires on the right side.

On the wings I finished terminating the right side wing wire connections and did not get to the left wing connection yet. I did not terminate the vhf RG-400 cable at the wing roots on the fuselage nor the wings yet.

I attached the VOR antenna to the vertical stabilizer tip. I ran the associated cable form the VS to the GTN 750 NAV connection. Sadly I did this twice since I ran RG-400 cable first and then realized this wasn’t the proper cable and that I had received a cable with the VOR antenna that I should be using. That made for TWO miserable trips into the tail cone that day.

Installed the firewall battery for the first time.

Wire Routing

MORE ….. Avionics Wire work…..

Dec 31, 2013. Hours 30. (Worked this over multiple days)

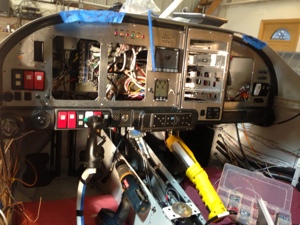
Over the past Holiday I have been non-stop working on wiring the systems under the dash and throughout the fuselage. I will say that I am not as young and flexible as I used to be and my body lets me know every time I decide to make it do something I think it still can do. Regardless the wiring is moving along despite the long hours of work.

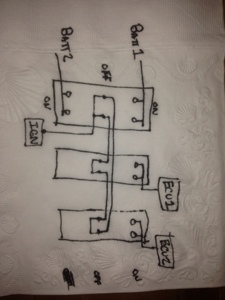
The VPX Pro is 95% wired with the exception of ALT1 and ALT2 connected at the box. All toggle switches are wired except for the IGN Batt 1 and IGN Batt 2 source switch. The three fuses associated with the IGN system are not terminated yet but I do have wires routed for the 5 AMP ECU breakers. I installed a 20 AMP c/b for the external power ports I will be installing throughout the fuselage. The mounting hole for this c/b was not originally planned for in the right side panel.

The two control sticks have been wired in but I still need to locate 9 pin back shells for the d-sub connectors. I shortened the vertical portion of the control stick so the base of the Infinity grip was at the lowest point on the control stick. I did not shorten the horizontal portion of the control stick where is inserts into the control receiver. I will wait to modify this once I receive the seats. With my height only being 5’4″ i am afraid I will encounter issues with having the stick to far back when I have the seat ll the way forward. I plan on creating on more notch to further move the seat forward to help me reach the peddles. If I run into issues I might need to shorten the rudder control cables so I can pull the rudder peddles further aft.

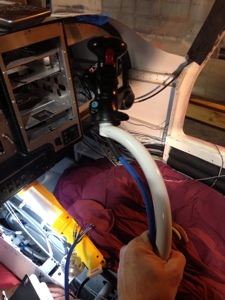
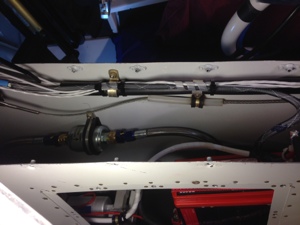
I worked with the GTS-800 coax cables for the upper and lower antennas. I cut off the EXTREMELY expensive QMA connectors that Garmin supplies. I had to cut 4 of them off since I could not properly route them throughout the fuselage to the overhead with the 90 degree connectors. This cost me and extra $145 dollars. Had I understood the price of these I would HAVE NEVER ALLOWED Stein’s guys to terminate the cables for me and “test” the GTS-800. Overall the routing went well and the cables are installed top and bottom.

Everyday I go out to the fuselage and work on the wiring. It seems that nothing ever changes. I know work is getting done, but this has been rather challenging to keep an upbeat attitude. I hope to work the wing root connectors and the two push pull cables for the heater controls. I also hope to install the switch for disconnecting the ground to the copilot stick so that a nonflying passenger will not affect the electrical controls on the stick.

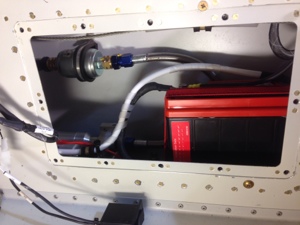
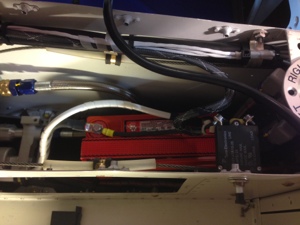
I also worked with the ELT and extended the 4 wire “telephone” cable to reach the dash. I also mounted the ELT orange noise box with velcro to the right side under the dash. This box contains a battery and so does the dash mounted control.. These two items will need to have a battery installed and have the dates tracked for battery replacement.

20131231-091015.jpg

20131231-091022.jpg

20131231-091029.jpg

20131231-091035.jpg

20131231-091059.jpg

20131231-091111.jpg

20131231-091130.jpg

20131231-091141.jpg

Avionics Wire Routing

Panel Work Continued

Nov 26-27th, 2013, 20 hours.

More worked continued on the panel wiring. Not much to report. Working towards finalizing the panel the best I can before installing it onto the fuselage.

20131213-204854.jpg

Avionics Wire Routing

Various Cable Routing throughout Fuselage

Sept 28th, 2013, 8 Hours

I received from Stein various wire I had previously order with the avionics that was mistakenly left out of the initial shipment so i went about running it throughout the fuselage. I routed a 5 conductor shield wire from the MH Oxygen bottle to the controller that will be mounted on the panel. I then ran the four separate cables required for the 4 individual controllers to the main control head in the panel.

I routed the rudder trim, 5 conductor no shield wire. I routed the pitch trim servo, 5 conductor no shield wire. The pitch servos wire runs near the pitch servo (GSA-28) and has a 9 pin connector inline near the the pitch servo. The reason for the 9 pin connector is for an entry point for the GSA-28 servo “trim” white wires to be connected to the elevator trim. Essentially the GSA-28 servo wire already has the four control wires (2 wires to the trim switch in this case VPX-Pro and 2 wires to the trim servo itself). Since the GSA-28 has an auto trim feature it needs to be connected between the switch and trim servo so it can auto trim and allow the user to trim the elevator also.