Engine

Engine Baffling Work Requird

10 hours, July 5-6, 2014

I started working on the engine baffling by removing the pilot side inlet ramp and associated rubber ramp that goes over the AC compressor. I threw it all in the trash to force myself to come up with a new design. I spoke with Nick and Dave about what needed to be corrected and dove into making the changes. Once I had the pilot side inlet ramp off, I trimmed the vertical angle piece covering some of the cylinder face and then went about threading the lower baffling rod that keeps the baffling wrapped tightly around the cylinders. There were large gaps in the baffling since the inlet ramps were pulled back away form the front cylinders causing the cylinder to not be wrapped properly.

I readjusted the lower portion of the cylinder baffles on both sides and now have the very well conformed and fitted to the cylinders 1,2 and 5,6. I then started working the pilot side inlet ramp redesign. ONce that was completed I then moved over to the copilot side and moved the inlet ramp inward and filled the gaps there. I used red RTV to sealed all the extra holes that could be letting out extra air where t wasn’t being used properly to cool anything. Two tubes used and I think I have most all the holes sealed.

The top cowling needed to have the inlet ramp cross sealed so air wouldn’t be dumped out the other sides without even hitting the engine. I correct this by putting a wall in the upper inlet ramps. I then added rubber baffling seal material to the pilot side upper ramp to help cover and make the air flow less turbulent over the AC compressor.

I believe I have almost all of the work completed that will make a huge difference in the cooling of the cylinders. I still have a couple of very small tweaks I want to make to the cowling but will see how the current changes effect the cooling first.

I also tightened the AC compressor belt and routed the low pressure line under the engine to allow the pilot side inlet ramp less obstruction. I had to order more hose and will charge the AC system once I have the new hose installed.
Flights

First Flight – July 3rd

1 hour, July 3rd.

After putting the interior back together and adding baggage tie downs to the back of the airplane and putting many access panels back on the plane I was able to start thinking I might have a chance at first flight on July 3rd. I contacted Nick Nafsinger who owns an RV10 and has lots of experience with the 10 to perform my first flight.

The flight left out of Polly Ranch heading towards Pearland Regional. The aircraft performed well but soon showed it had an engine cooling issue. The #2 CHT hit 454F before Nick could pull back the power to 20″ MP to keep it out of the red. He landed at Pearland where I took the cowling off the engine for inspection. The engine looked great with no signs of loose fittings for fuel or oil. I decided to have Nick fly it back to Polly Ranch at a reduced power setting so I could perform the needed baffling re work to get the CHT’s down.

I looked at the engine data and other than #2 CHT reaching the 450F limit all other cylinders remained lower.

Inspection

June 30th, DAR Inspection

4 hours, June 30th, 2014

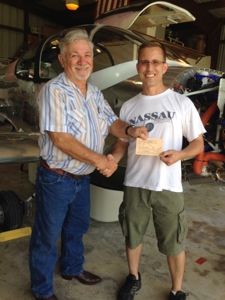
N815DG was inspected this day by Mel Asberry, DAR. Hank and I split the cost and flew in Mel on Southwest to accomplish the inspection on Hank’s airplane at EFD in the AM and then over to perform our inspection in the PM. We met for lunch after he inspected Hanks RV10 and I then took Mel over to see N815DG.

The inspection went very well with a washer change and a flip of the aileron trim direction. Then it was back together with the interior and prepping for first flight.

Thanks Mel for a great experience!

20140708-071808.jpg

Section 39, Control System

Elevator Travel

2 hours, 25 June 2014

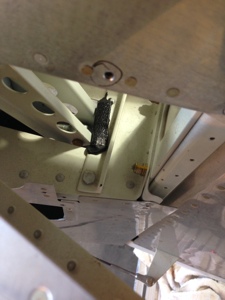
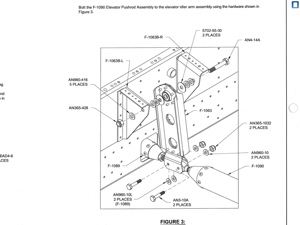
I spent more time looking at the elevator control rod system. There is a slight interference when the stick is full aft. I adjusted the threaded rod end by one revolution and then torqued and torqued sealed the nuts back in place on the rod end through bolt and rod end jam nut. I then went to the elevator and added a small piece of McMaster Carr door seal strip to the bump stop and glued in place with the elevator in full up position. This limited the travel by one more degree making the final up position be at 29 degrees deflection.

20140626-100337.jpg

20140626-100350.jpg

Panel Design

Front Panel Express Main Panel arrived

2.5 hours, 25 June 2014

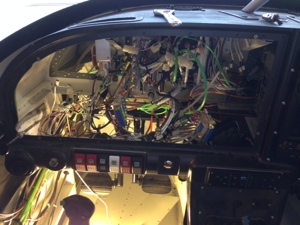
After spending many hours converting the CAD file I had for the original left side panel into Front Panel Express I received the final product in the mail yesterday. I must say overall there were only 2 issues that I saw once installing the panel. The lower right hole for mounting the AOA screen was not all the way through drilled. The IGN/ECU switch panel bezel was larger than I thought I had measured and thus is “runs” over or “covers” a small portion of the horizontal line denoting ECU 1 and ECU 2 form the IGN switches plus the word “LIGHTING” is slightly covered on the bottom side of the bezel. Overall I see no issues with this.

I pulled out all the items out of the panel and swapped over the back plates holding in the G3X screens to the new panel. This required match drilling and counter sinking for the rivet. I installed the new panel with only one issue as I dropped a very small nut that holds one of the rheostats in place for dimmer control. I could not find the nut and suspect it fell all the way down to the sub floor. No good… now I need to find a replacement. Plus I dont have a clue where that one went to and I made it a point during the entire build to ALWAYS find the items that “got away”.

Ops check good!

20140626-093652.jpg

Seats

Rear Seats Arrived

0.5 hours, 25 June 2014

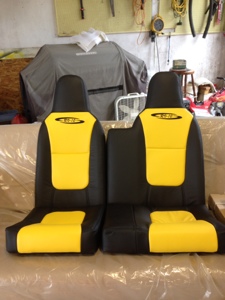
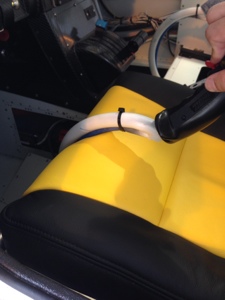
The Aerosport seats arrived !! They look great and we cant wait to install them after the inspection of the airplane is completed. I will need to add velcro to the bottom of the seats.

20140626-092713.jpg

Section 39, Control System

Elevator Control Tube and Aileron cross link between sticks

3 hours, 24 June 2014

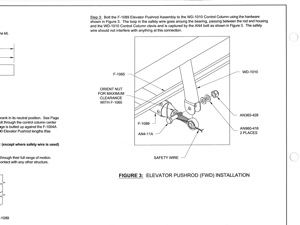
I spent time with tearing apart the center tunnel section to gain access to the elevator push tube where it connects to the control sticks. This area is very tight and there is interference between the elevator tube and the aileron cross control rod when in full stick aft. I had to lengthen the distance between the tube end and the attachment point so the aileron Control rod would not hit the jam nut on the face of the tube. This requires the threaded rod end to be extremely far out of the end of the tube thus requiring a safety wire to be put in place. I made the adjustments and safety wired the rod end per Vans Section 39-4.

20140625-101601.jpg

Uncategorized

EAA local Tech visit

3 hours, 25 June 2014

Dave Forster our local EAA Tech counselor did his inspection of N815DG to ready me for the final inspection scheduled for 30 June. I hope the schedule holds but regardless I have a 24 item list of items I want to check off prior to the inspection. Most all of the items pointed out are very minor and don’t necessarily require changing but are captured incase I want to change them. The review was great since it allowed a second set of eyes on the plane with a different point of view.

I will be addressing the issue with importance based upon Inspection versus First Flight.

Avionics

Updated Database in G3X system and GTN-750

1 hour, 24 June 2014

I brought up to date all the databases in the G3X system and GTN-750. I had to first register the GTN750 system and G3X system. Uploads went well but did take a while a you have to load each G3X screen individually.

I also tried to update the G3X system software to 8.70. I am having some small difficulties but am talking with the G3Xperts. I am sure it will get resolved easily as I have already been given advise on what to try.

Section 39, Control System

The quest for a control stick solution

6 hours, 21 June 2014
This day Dave Forster and I went on a whirlwind chase to compare the RV10 control stick to Phil Perry and Nick Nasfinger. This took us to two different airports across Houston so Dave offered up his Rocket for the pursuit. We launched out of Polly Ranch for our first stop at DUNHAM and private airfield on the north east side of Houston. We grabbed Phils control sticks and looked over his project and discussed a couple of items. We then launched out to see Nick’s RV10 at Pearland. I sat in his RV10 and was able to get an idea of how a flying RV10 feels. We then launched back over to Polly Ranch.

We essential decided to make a bend in the stick just below where the vertical portion holding the infinity grip attaches to the curved portion. This allowed us to clear the panel switches with out any issues. Thanks Dave to the help on this one!!

We still think we have a seat issue with the new seat sitting a little taller than stock and this is making the stick movement become a little less since you have taken away the clearance under the stick. I will be looking into this more as we get closer to first flight. I will likely add rudder pedal extensions so I can move the seat back further to guarantee the stick movement.

20140625-094811.jpg