Interior - Aerosport Side Panels

Aerosport Side Panels

Aug 5-7, 2013 – 6 hours.

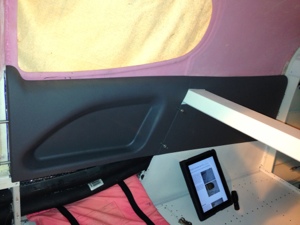
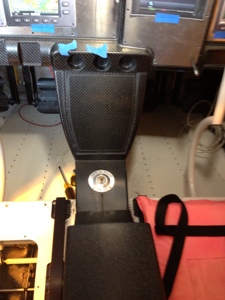
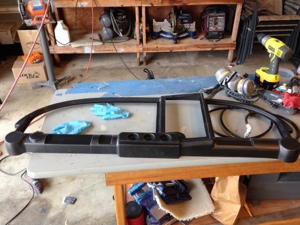
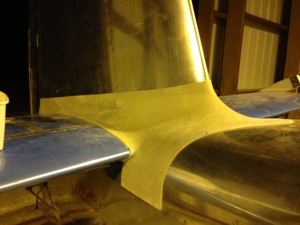
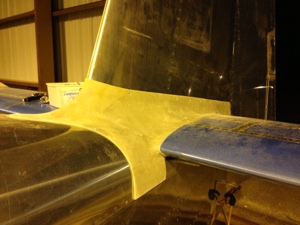
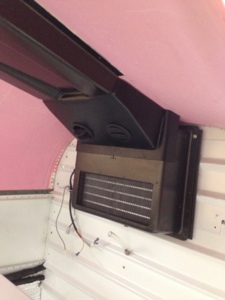
Started to work on the Aerosport front seat, rear seat and baggage area side panels. The instructions call for installing the rear seat side panels then the baggage area panels then finally the front seat panels. I choose the front seat panels, not sure why but I did and this seemed to work out ok but they are much harder to install than the others. The front panel consisted of dealing with much more trimming and fitting then the others. Once the panel on the front left was fitted I moved to the right side where I had to contend with the Air Conditioning hoses as they ran to the firewall. This caused me to put a cutout to allow for the bulge caused by the hoses.

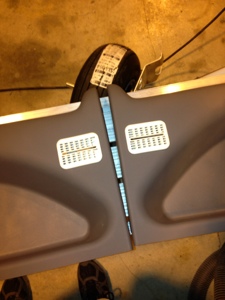
The rear seat and baggage panels are fairly straight forward once you figure out the alignment line you want to establish on the top side of the panels. The mounting holes are drilled on all panels accept for the front seat panels. I still need to attach the nut plates and drill the attach holes into the front seat panels. I will be making a clip to help hold the right side front panel near the Air Conditioning hoses. The clip will help apply pressure to the panel over a larger area that just a screw might.

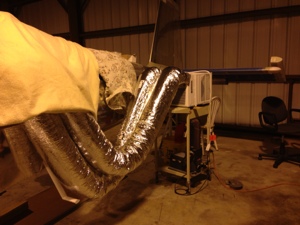
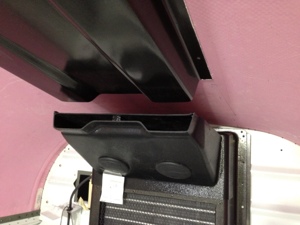
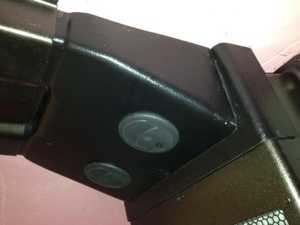
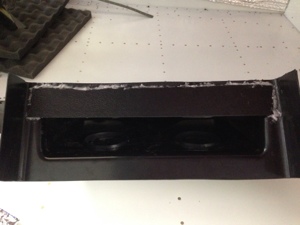
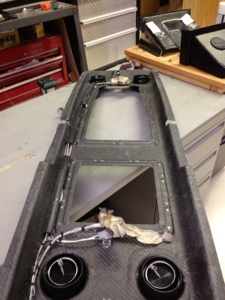
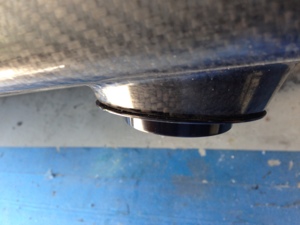
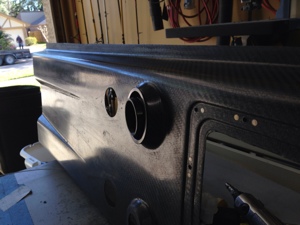
I mounted the control arms to the back seat outside air vent controls. I also cut the air vent holes in the rear seat side panel and matched up the transitions air duct pieces between the side wall skin and the panels.

20130809-005859.jpg

20130809-005908.jpg

Engine Prop

Prop Arrived

On August 5, 2013, the propeller arrived from Hartzell. This is the HC-C3Y1R-1N//N7605C a composite prop with a stainless core three bladed prop. I ordered it through Vans and it shipped directly from Hartzell.

The 15″ spinner will be coming from a local shop in Pearland, TX at Pearland Regional Airport. This is a polished spinner. The reason it is 15″, actually something more like 14.7/8″, is because of the Show Planes RV10 cowl that I will be using. I also order a control arm from Hartzell that will be sourced from the Pearland shop. The control arm is P/N: C-4582-P and the spinner part number is D-7709P.

20130809-004154.jpg

20130809-004203.jpg

Armrest Armrest and Center Console Interior - Aerosport

Aerosport Center Armrest and Console

Saturday Aug 3, 2013 12 hours.

I worked with the armrest and center console that will eventually hold the throttle quad. This took a little time since I really wanted to get the fitment right. The gas selector is in a non standard location compared to Vans so I had to deal with that condition plus I have different rudder pedals. The Control Approach pedals require the mounting of the side panel of the center console to be trimmed to fit around the tubes. Plus since I have the pedals as far aft as possible since I am short I think that might have added to some of the reason why the trimming need to occur. After assembling the center console on the bench I was able to locate the holes for mounting it to the tunnel. This went fairly well along with attaching it to the dash panel.

I did not mount the actual throttle quad since I am unsure of what sytle I want to use. Geoff has two kinds and I am waiting on them to send me the second kind so I can fit them and see what I like best.

20130807-144800.jpg

Interior - Aerosport Panel

Aerosport RV10 Panel

Received the Aerosport panel and interior parts from Geoff. The products look great and seem to be fairly straight forward to install. I started working with the panel and had to trim some edges to allow it to fit better. Mounting of the back plate for the panel was straight forward also but I guess my support structure the panel mounts isn’t perfectly matched so it is rather tricky to install all the fasteners. You essentially have to work the panel around by installing various screws to make all the holes line up. I was able to trim out the portions of the carbon fiber panel rather easy. I then went about adding all the required mounting holes to hold in the blank panels that will eventually hold various avionics.
(Aug 1-2, 16 hours)

I also got a little creative with trying to keep cool in the hangar. It was rather hot in there while i was working.

20130807-143341.jpg

20130807-143355.jpg

20130807-143423.jpg

20130807-143918.jpg

Uncategorized

A Family Change amongst all the other changes in our life

My wife and I recently discovered July 28th, 2013, our family will now be 3+ 1 more if God blesses us with a healty pregency. Why not through another change into the mix right!

20130807-142621.jpg

Section 12, Empennage Fairings

Empennage Fairing Fit/Install

July 27, 2013 10 hours.

After an extremely long building pause…… as we were working madly to get the new house into “our” standards we didn’t touch the RV10 once. That was about 3 months of no work on the RV10, not good but we did get 9 new windows installed, more insulation blown in the attic, painted many of the rooms, had carpet installed in three rooms, had a door installed in the master bed room, installed three ceiling fans, fixed multiple wiring issues, installed some flooring and had the roof resealed and glazed. and we still aren’t finished.

After moving the RV10 out of the corner of the hangar from behind the many piles of moving boxes we started with setting up shop. We originally planned on cleaning the hangar and repainting before the hangar move in but the timing just didn’t work out. We decided to just concentrate on the RV10 build and worry about the hangar later. We rather be flying first before we have a great looking hangar.

I started working on the empennage section and installed the horizontal and vertical stabilizers and the horizontal elevators. After removing and installing these several times I finally had the empennage fairing installed/trimmed properly to my content. I then installed the rudder, although I did not torque the bolts for this since likely it will come back off once again. All the bolts that attach the vertical and horizontal parts are torqued along with the horizontal elevators.

I did realize that my trim tab machined nuts are machined at the wrong angle. Very disappointing since i machined them back when I “had” access to the machine shop. Now that I changed jobs I will have to buy them from IFlyRV10.com.

20130807-113844.jpg

20130807-113857.jpg

Uncategorized

New Home Purchase

In May 2013 we purchased a home located on Polly Ranch Estates (7XS0), an airpark community that was started in 1973. It a great little place for the kiddo to grow up and for us to house the RV10 and boat. We will go through the process of making the home ours and likely install new windows, paint the rooms along with new carpet.

Below are some pictures of the RV10 move to the new home. We did not actually move into the new home until late June once we sold our former home. The RV10 went first since we needed to clean out the garage to start the moving process.

The move with the RV10 went well and had absolutely no issues. I did install the cabin cover for good along with the pre attached overhead console and installed several panels to make the airplane “road” ready.

The wings were moved the next weekend after the RV10 made it way across town, 10 mile trip.

20130807-110324.jpg

20130807-110421.jpg

20130807-110447.jpg

20130807-141230.jpg

Section 46, Engine Mount and Landing Gear

Landing Gear mount

March 16th, 2 hours. I decided to set the fuselage on the gear since i would need to be moving the “airplane” in the near future. More on that story later on. My parents had come into town so I had extra help and asked my father to lend a helping hand. This process went very smoothly and honestly had I known it was that easy I would have waited a bit longer. Being on the gear makes it a little more difficult to work on especially for a short guy like myself, 5’4″ !!

20130417-082041.jpg

20130417-082111.jpg

20130417-082133.jpg

20130417-082149.jpg

20130417-082208.jpg

20130417-082221.jpg

Flight Line Air Conditioning Section 43, Cabin Cover Systems

Overhead cabin transitions from Evaporator

March 16th, 4 hours. I received back the molded transition piece from John at Flightline AC that was produced from the transition piece I made. Overall the piece looks fantastic but we both knew the piece would need trimming to properly fit since they made the transition piece based upon little to no extra information. In one of the pictures you can see how the original intent was to be, however based upon this installation and many other likely to follow for others the transition piece will need to be modified a bit more to be mounted much higher. I trimmed off the top portion of the piece that wraps around the evaporator. I then lowered the inside backing wall that helps seal the evaporator face to the transition since I had to raise the entire tranission up higher. The tranistion now mounts up to the overhed, evaporator and cabin top very nicely. I still need to locate a mounting plate for the front mounting hole already in the evaporator and place a rubber or foam gasket material on the surface that require to be sealed. I think John will revise his mold slightly to accomidate the angle differences but overall the tranisiton piece is very near it final shape.

John placed to vents in the transition piece to help throttle the air flow plus allow the cold air to be more quickly recirculated thru the evaporator to help cool down the cabin quicker and achive an overall lower temperature.

20130417-103744.jpg

20130417-103755.jpg

20130417-103809.jpg

20130417-103822.jpg

Electrical Systems

Overhead Switch, Air Vents, and Light install

March 9th, 2013 (9 hours for all). Received the overhead switch panel from Panel Express and install the switches to see how it would look. I had to cut out a portion of the overhead to accommodate the switches to be removed with the panel. I had originally thought that I would mount the switches into the thru holes capturing the overhead panel and the switch panel. I quickly realized that would be way to hard to accomplish with little to no hand room. (Total time for this work and prior, 4 hours)

I then moved to installing the overhead air vents that John sent me from Flightline AC. He searched long and hard trying to find the appropriate vents that can accommodate the large amounts of air the evaporator can flow. The air vents are very nice and are low profile so not to protrude into head space. The only issue is they might be a little more difficult to adjust since they are low profile but I think they will work perfectly over all. I did need to trim the retainer ring down a couple of inches since it was to tall to fit between the cabin top and the overhead. I used a very small amount of grease on the retaining plastic nut that holes the body of the air vent so to create more drag on the nut and hopefully keep it from loosing on it own. Since these vents are larger than the standard air vents the overhead was designed for I had to take the hole diameter out to the very edges of the mounting face. Using the air grinder with a round sanding drum helped in the process of fitting the vents. (3 hours)

Moving on to the led lights, we installed four of the Aveo Eyebeam Touch lights into the overhead. I had already drilled out the holes to accommodate them in a prior step so I installed them and connected the internal wiring of the overhead to the lights. (2 hours)

At some point later in the build process when the interior starts to become complete I will install strip LED lighting to the outside edge of the overhead. This will provide the cabin with lighting and will be dimmable.

20130415-100733.jpg20130415-100810.jpg20130415-100902.jpg20130415-100923.jpg20130415-100937.jpg20130415-100952.jpg